Custom manager pages
Custom manager pages built to manage different sections of the website and add additional data
WL General
FAQ Categories
Create and manage FAQ categories
All FAQ's should be assigned to a category, categories help organise questions and answers so they can be pulled through on the frontend of the website through a Content Block field
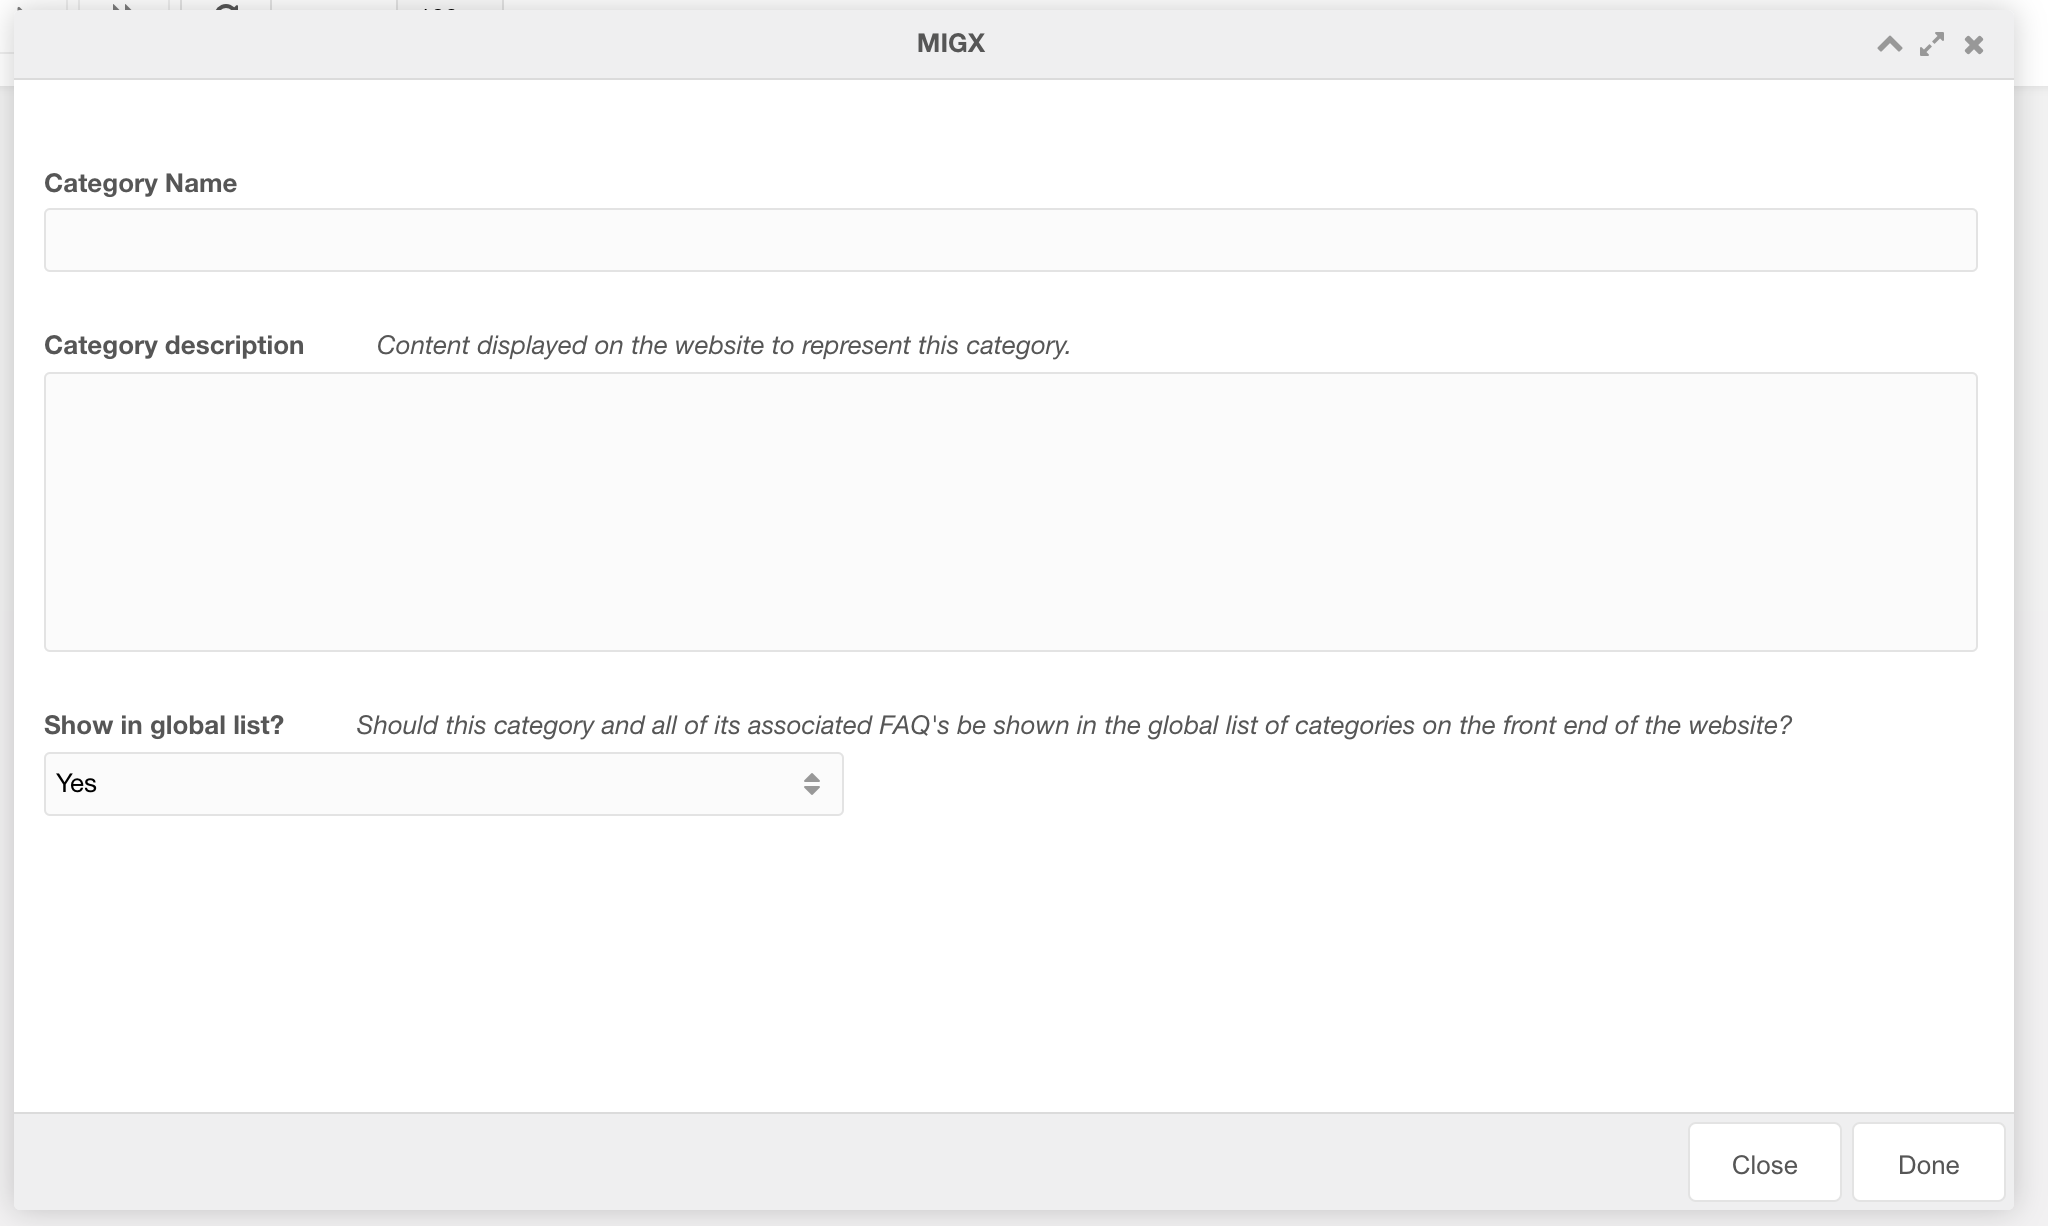
Adding a category
- Click 'Create category'
- Enter category name, description and select if this category should be published on the website
Updating a category
- Right click the category row you want to update
- Click 'Edit'
- Update category details
FAQ's
Create and manage FAQs
FAQs help answer any questions users possibly have to reduce blocks and increase conversions
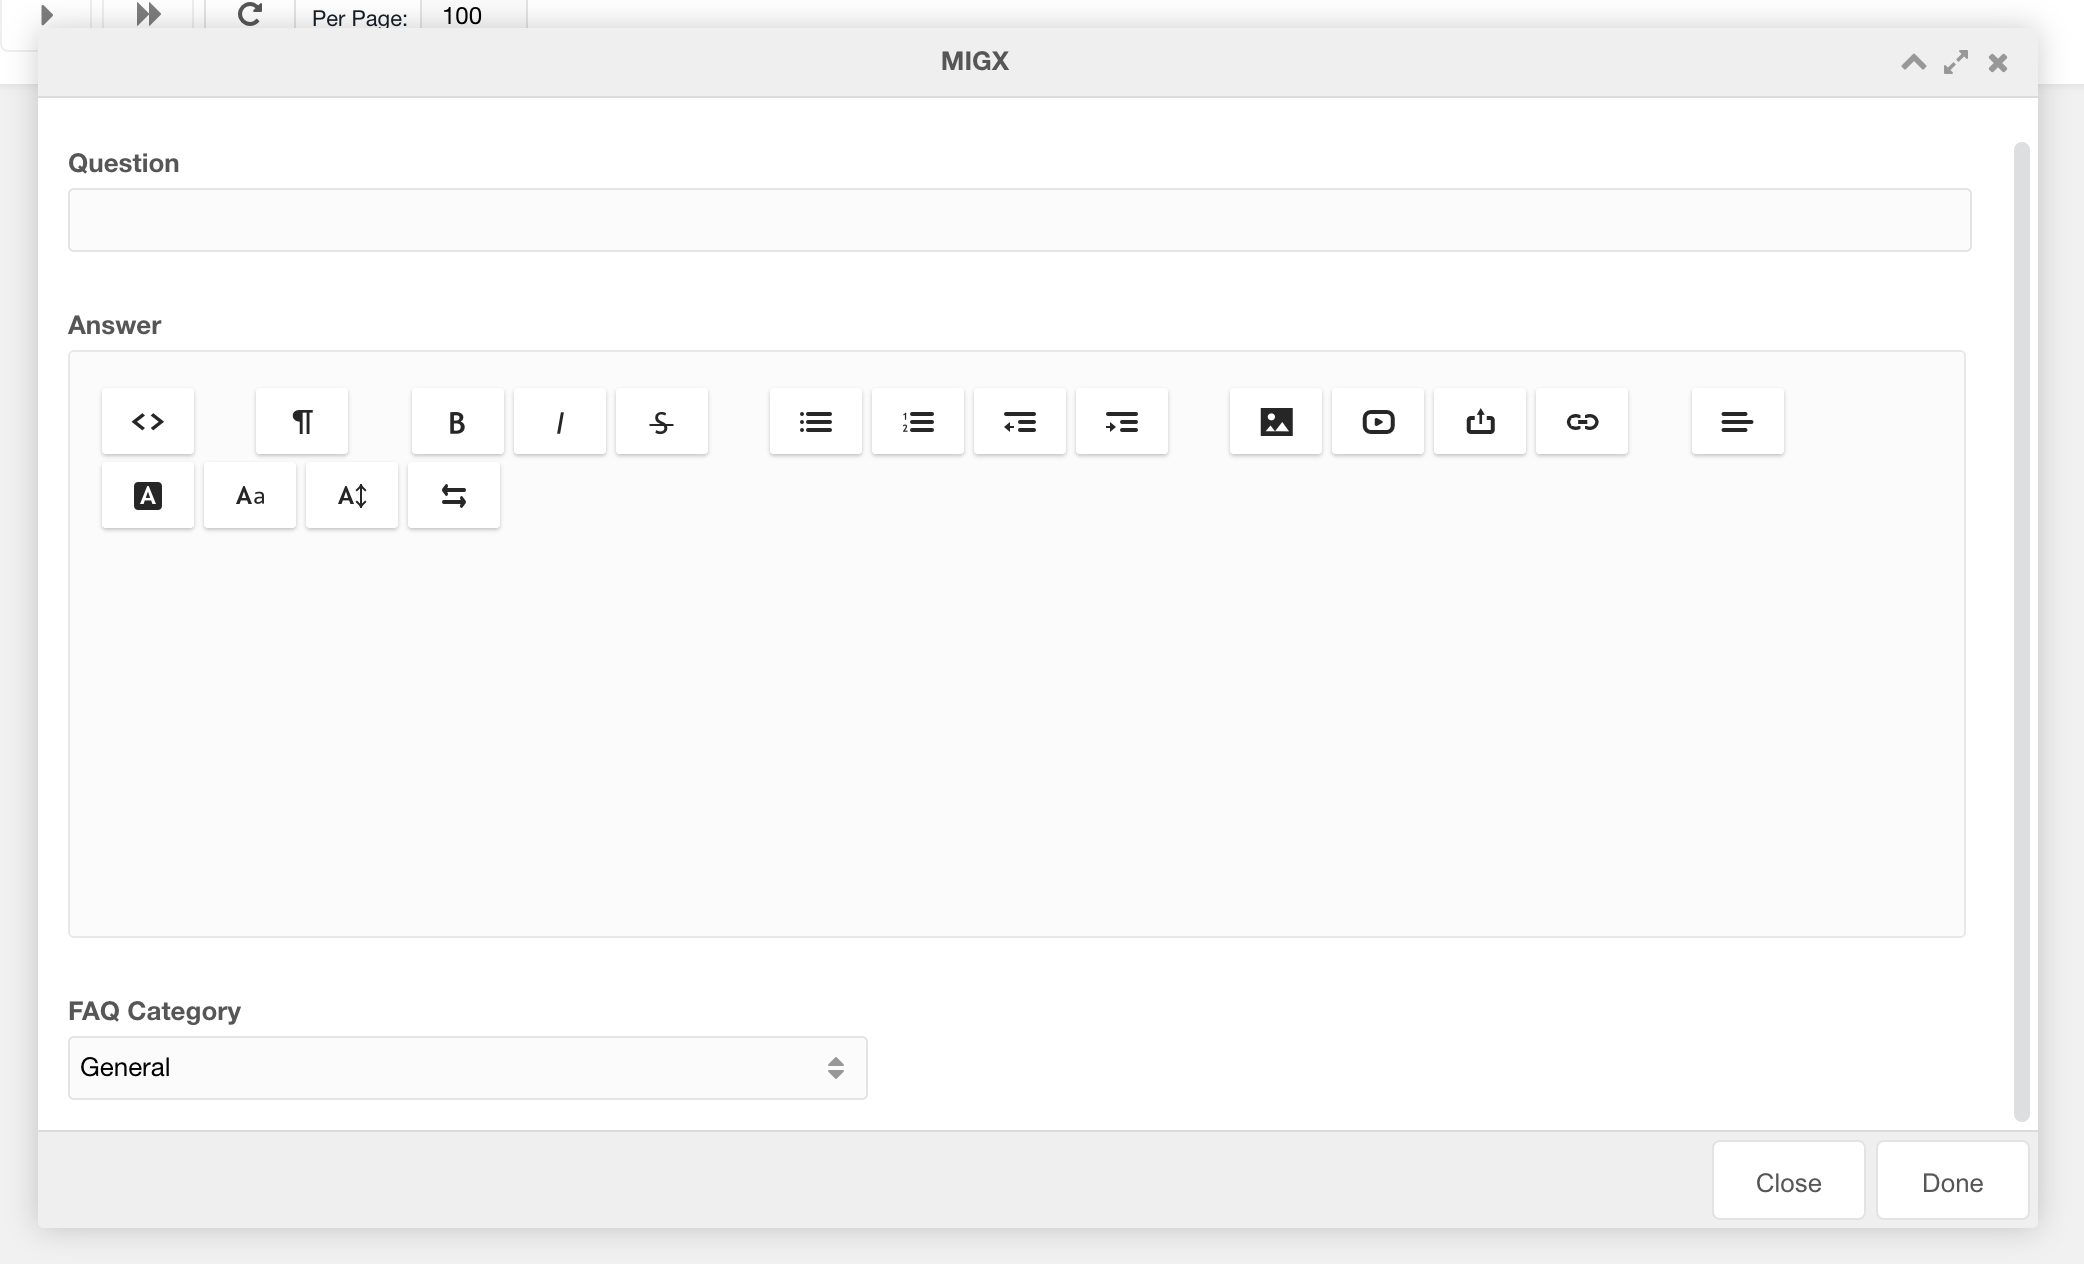
Adding an FAQ
- Click 'Add FAQ'
- Enter the Question, Answer and the Category (See creating categories) that this question will belong to. You can also choose to Publish or Unpublish this question to prevent it from being shown on the frontend.
Updating a category
- Right-click the question row you want to update
- Click 'Edit'
- Update details
Notification banners

Figure 1

Figure 2
Adding banners

Figure 3
Table 1
| Setting | Description | Default |
| Name | Name of this banner | |
| Content | Content for this banner | |
| Background colour | The background colour of the notification banner | Blue light |
| Image | Add an image to the left of the content, if there is no image the content will be centre aligned | |
| Context key | The context key to assign the banner to | |
| Resources | Enter a comma separated list of resource to limit this banner to | |
| Banner position | The position of the notification banner Above navigation will show up to 3 banners Below navigation will only show 1 banner |
Above navigation |
| Order | Arrange the order of the banners on the page. Note, you can add up to three banners above the header and only one below the header. The banners are assigned to the page based on their order, if you have two banners assigned below the header then only one will show at any one time. The Banner with the lowest number will show first. If a user dismisses a banner and another banner is set but not shown due to its order limit, it may then be presented to the user. |
0 |
| Can this banner be dismissed | You can set if the banner can be dismissed or not. Banners that are dismissable will set a cookie on the user's browser which prevents the banner from appearing again. | Dismissable |
| Banner published | You can publish/ unpublish banners so they show/ don't show | published |
WL Offices
This CMP allows you to manage all Waterlogic Office locations and add additional drop down links to the Office card in different languages/ for different contexts.
How to add a location
Under the Tab Office Locations, you can add and edit Locations which to add Offices to

Figure 1

Figure 2
How to add offices
Offices can be added under the Waterlogic Offices tab.

Figure 3
Click Add Item to create a new office

Figure 4
Table 1
| Setting | Description | Default |
| Location | Select the location of this office. These locations relate to the locations added in the Waterlogic Locations tab | |
| Office name | Name of the office | |
| Country code | 2 character country code - this generates the flag that is shown at the top of the card i.e. GB, US, DE, FR | |
| Office address | Address of the office (We recommended that to add a new line you press Shift + Enter to add a line break and not a new paragraph) | |
| Wain website | Website address | |
| Email address | Email address for the office | |
| Phone number | Phone number for the office | |
| Fax number | Fax number for the office | |
| Dropdown links | Add dropdown links |
Adding dropdown links
To add dropdown links click the Add item button

Figure 5
Table 2
| Setting | Description | Default |
| Context key | context key that relates to a waterlogic website context. By setting this, it allows you to add different links and translations depending on the website context. I.e. gb can show UK specific links while fr can have a french translation and french specific links | |
| Dropdown title | Title of the dropdown. Enter the translation for the context i.e. French for the fr context | |
| Dropdown description | A small description that shows when the dropdown links show | |
| Dropdown links | A modal that allows you to add different links for each context |
Adding dropdown links

Figure 6
Table 3
| Setting | Description | Default |
| Link type | Type of link | Resource ID |
| Link location | Location of the link, if type is ID then enter the resource ID otherwise enter the full URL to the external URL | |
| Link text | Text of the link |

Figure 7
WL Leaders
This CMP allows you to manage Waterlogic Leadership board. There are three different sections that require filling out.
How to add Leader groups
Under the tab Leader groups, you can add and manage different types of groups

Figure 1

Figure 2
Table 1
| Setting | Description | Default |
| Group name | Enter the name of this leadership group | |
| Lexicon | Enter the lexicon string that corresponds to this name |
How to Leadership titles
Each leader needs to be assigned a title as well as a group, you can add in different leader titles here

Figure 3
Click Add Item to create a new title

Figure 4
Table 2
| Setting | Description | Default |
| Leadership title | Enter the name of this leadership title | |
| Lexicon | Enter the lexicon string that corresponds to this name |
Adding Leaders

Figure 5

Figure 6
Table 3
| Setting | Description | Default |
| Leadership group | Select a leadership to add the leader to | |
| Name | Name of the leader | |
| Leadership title | Select a title for the leader | |
| Linkedin ID | Enter the ID of the leader | |
| Image | Choose an image of the leader | |
| About leader | Add translations and content for this leader. Recommended length of text for each leader is between 700-750 characters. |
Adding translated content
To add translated content for this leader add a new item by clicking Add Item

Figure 7
Table 4
| Setting | Description | Default |
| Language | Choose the language context for this translation | |
| Leader description | Enter a description for the leader for the chosen website translation. Recommended length of text for each leader is between 700-750 characters. |
WL Locations
In order to manage the complexities of languages and locations, it's important these settings are kept up to date and assigned correctly. This section powers everything from the location links generated on the locations modal to the languages related contexts.
Adding a language
Under the Waterlogic Navigation, click WL Locations item.
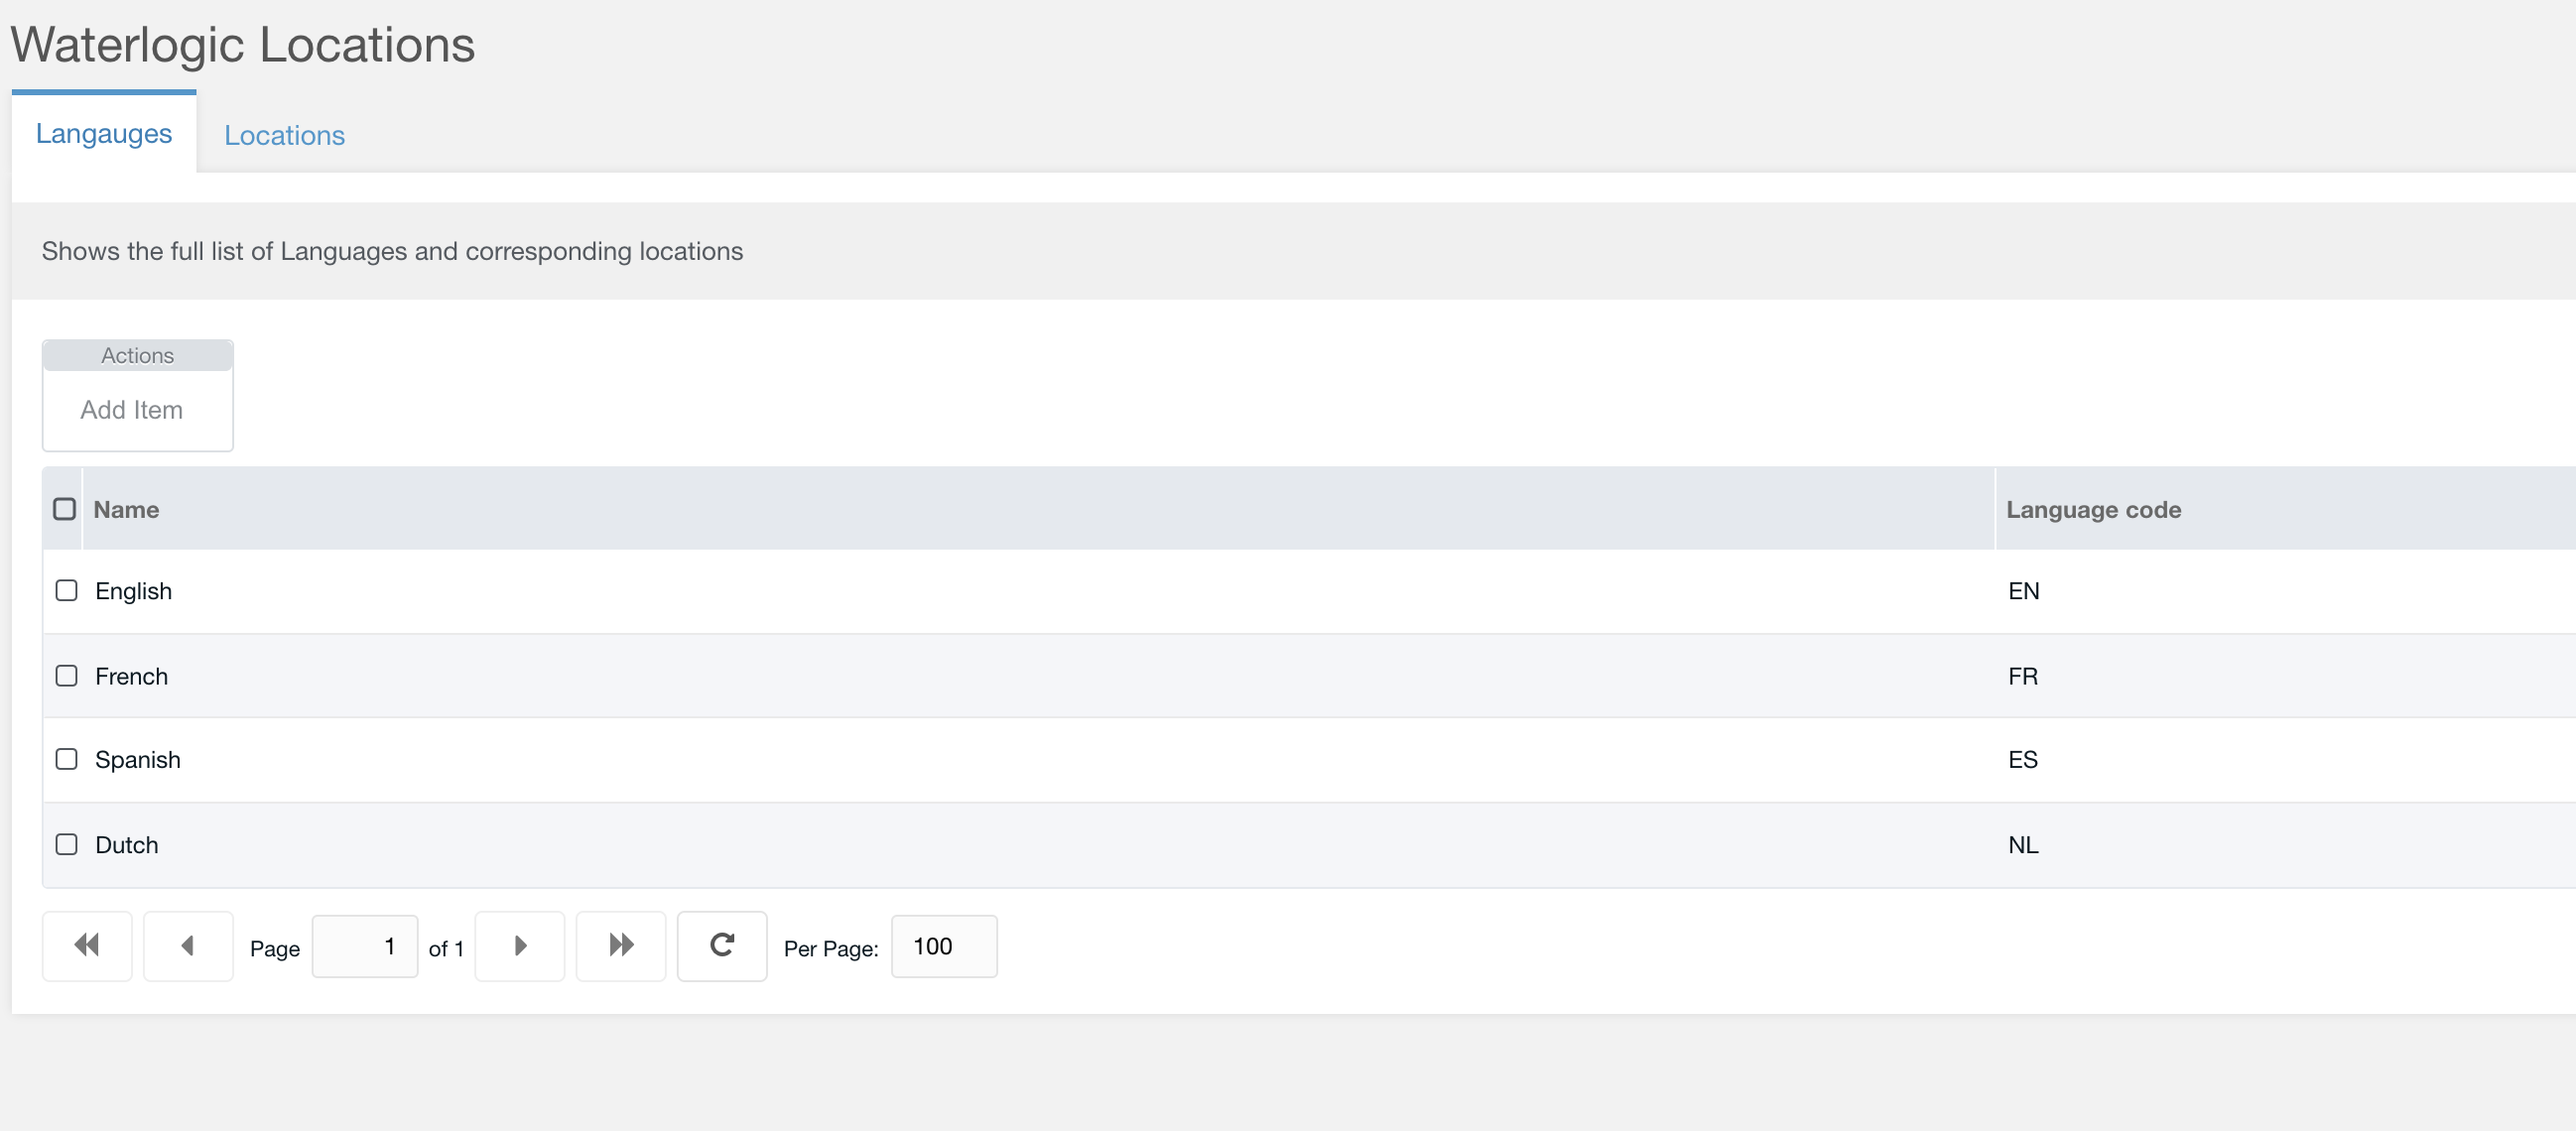
Figure 1
Add a new language by clicking 'Add Item'

Figure 2
Table 1
| Option | Description | Default |
| Language name | Name of the language | |
| Language code | ISO lang code i.e. EN, FR, AR, ES |
Add a location
Add a Waterlogic location that relates new Waterlogic websites & legacy sites

Figure 3

Figure 4
Table 2
| Option | Description | Default |
| Location name | Name of the location | |
| Language | Select a language from the dropdown. Languages are selected from the languages added in the previous table | |
| Country code | ISO country code i.e. GB, US, etc | |
| Locale | The locale of the country language entered as lang_COUTRY ie. en_GB, es_ES, fr_BE | |
| Context key | Select the context key of the website and relates to this Language/ Location | |
| Site url | Full URL of the website including any subdomians | |
| Legacy URL | If the new website has not been built you can point the language to a legacy website |
The above settings are used to generate some of the following components:

